Traders can trade Binance Futures on cleo.finance via their connected Binance account. In this part of the documentation, we will go through all the steps from creating a Binance account to connecting it to cleo.finance.
We will be guiding you through creating a Binance account, creating an API key, and connecting the API key to the cleo.finance. The whole process is fairly easy and straightforward.
How to create a Binance account
You’ll learn how to create your Binance Futures account if you don’t have one yet.
1. Go to Binance’s homepage. (Always triple-check the website domain!) Click “Register” in the upper right corner or “Get Started” in the main fold of the site.
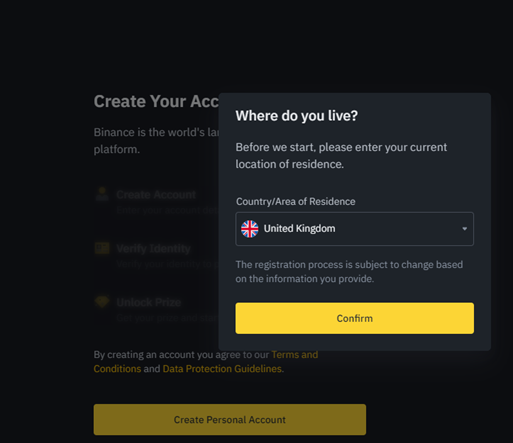
2. Select your country of residence and confirm
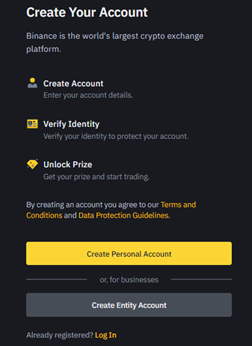
3. Click “Create Personal Account” once you finish reading the Terms and Conditions and Data Protection Guidelines.
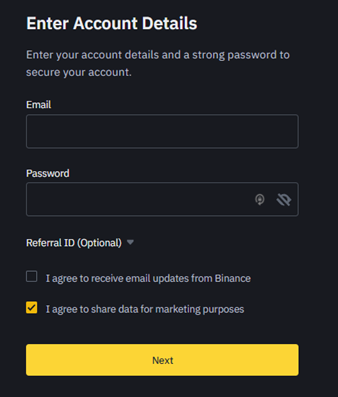
4. Input your preferred email and password.
How to enable Futures trading in Binance
1. Log into your Binance account and go to your wallet.
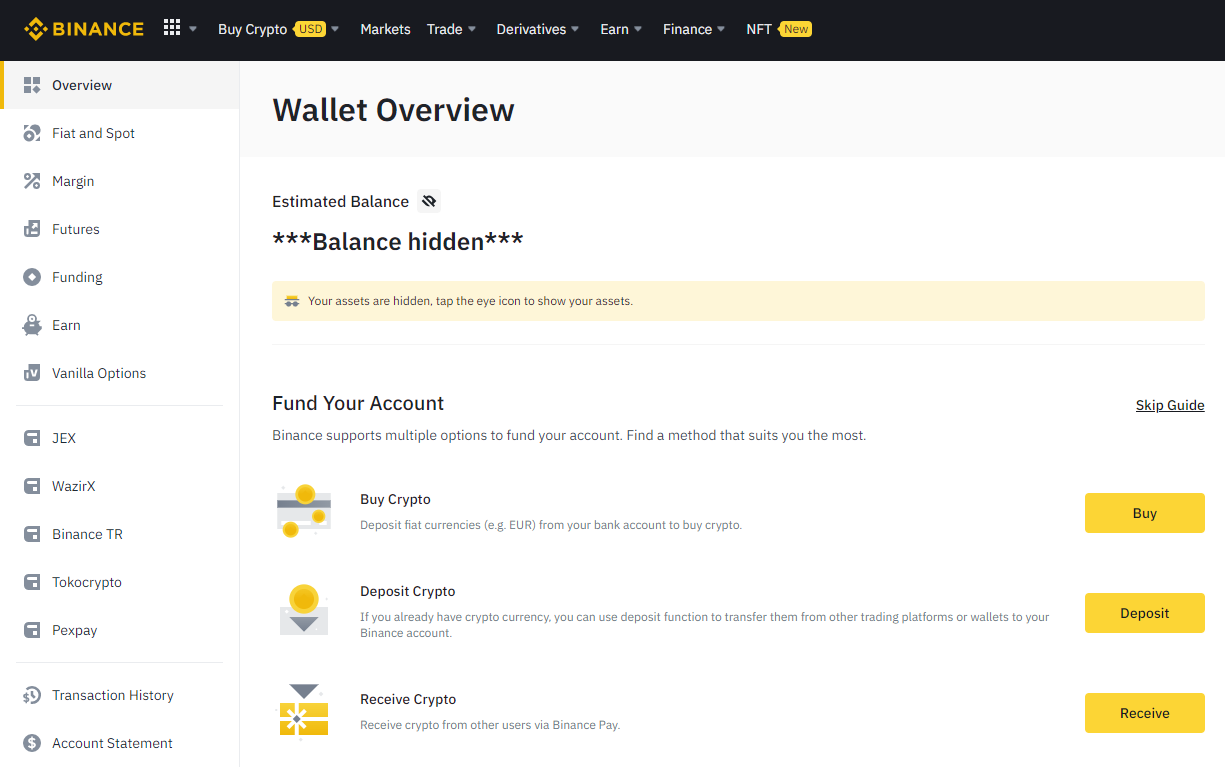
2. Click “Futures” and open a futures account. Again – make sure you have the Futures Referral field empty.
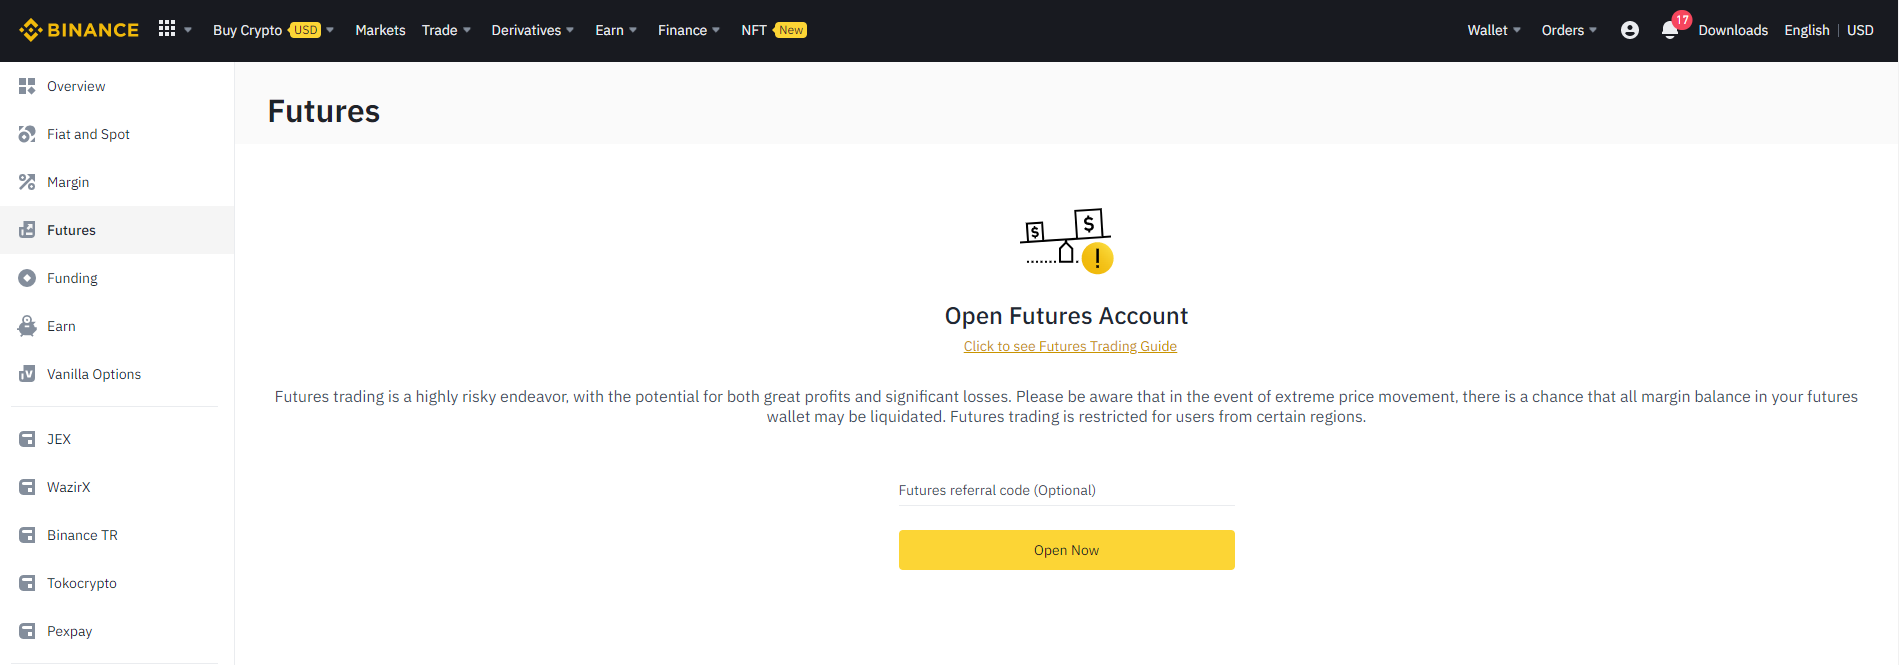
3. Once you’ve passed the quiz, your Binance Futures is created and enabled. You can start trading.
How to Enable Hedging Mode
Hedging mode is one of the requirements for connecting your Binance to the Cleo Trading Platform. In this part, we will be explaining how to enable hedging mode on your Binance account. It takes just couple of minutes.
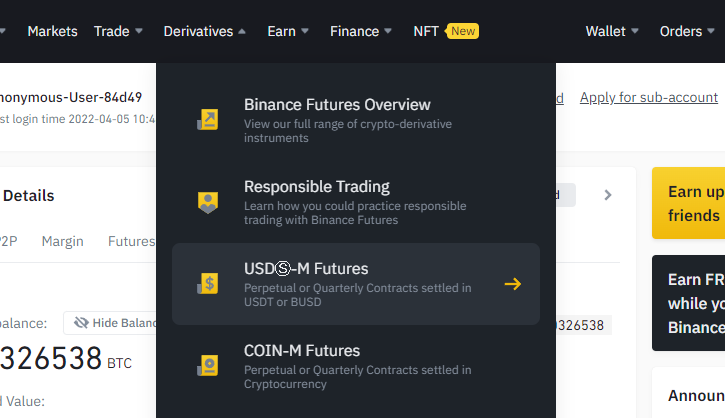
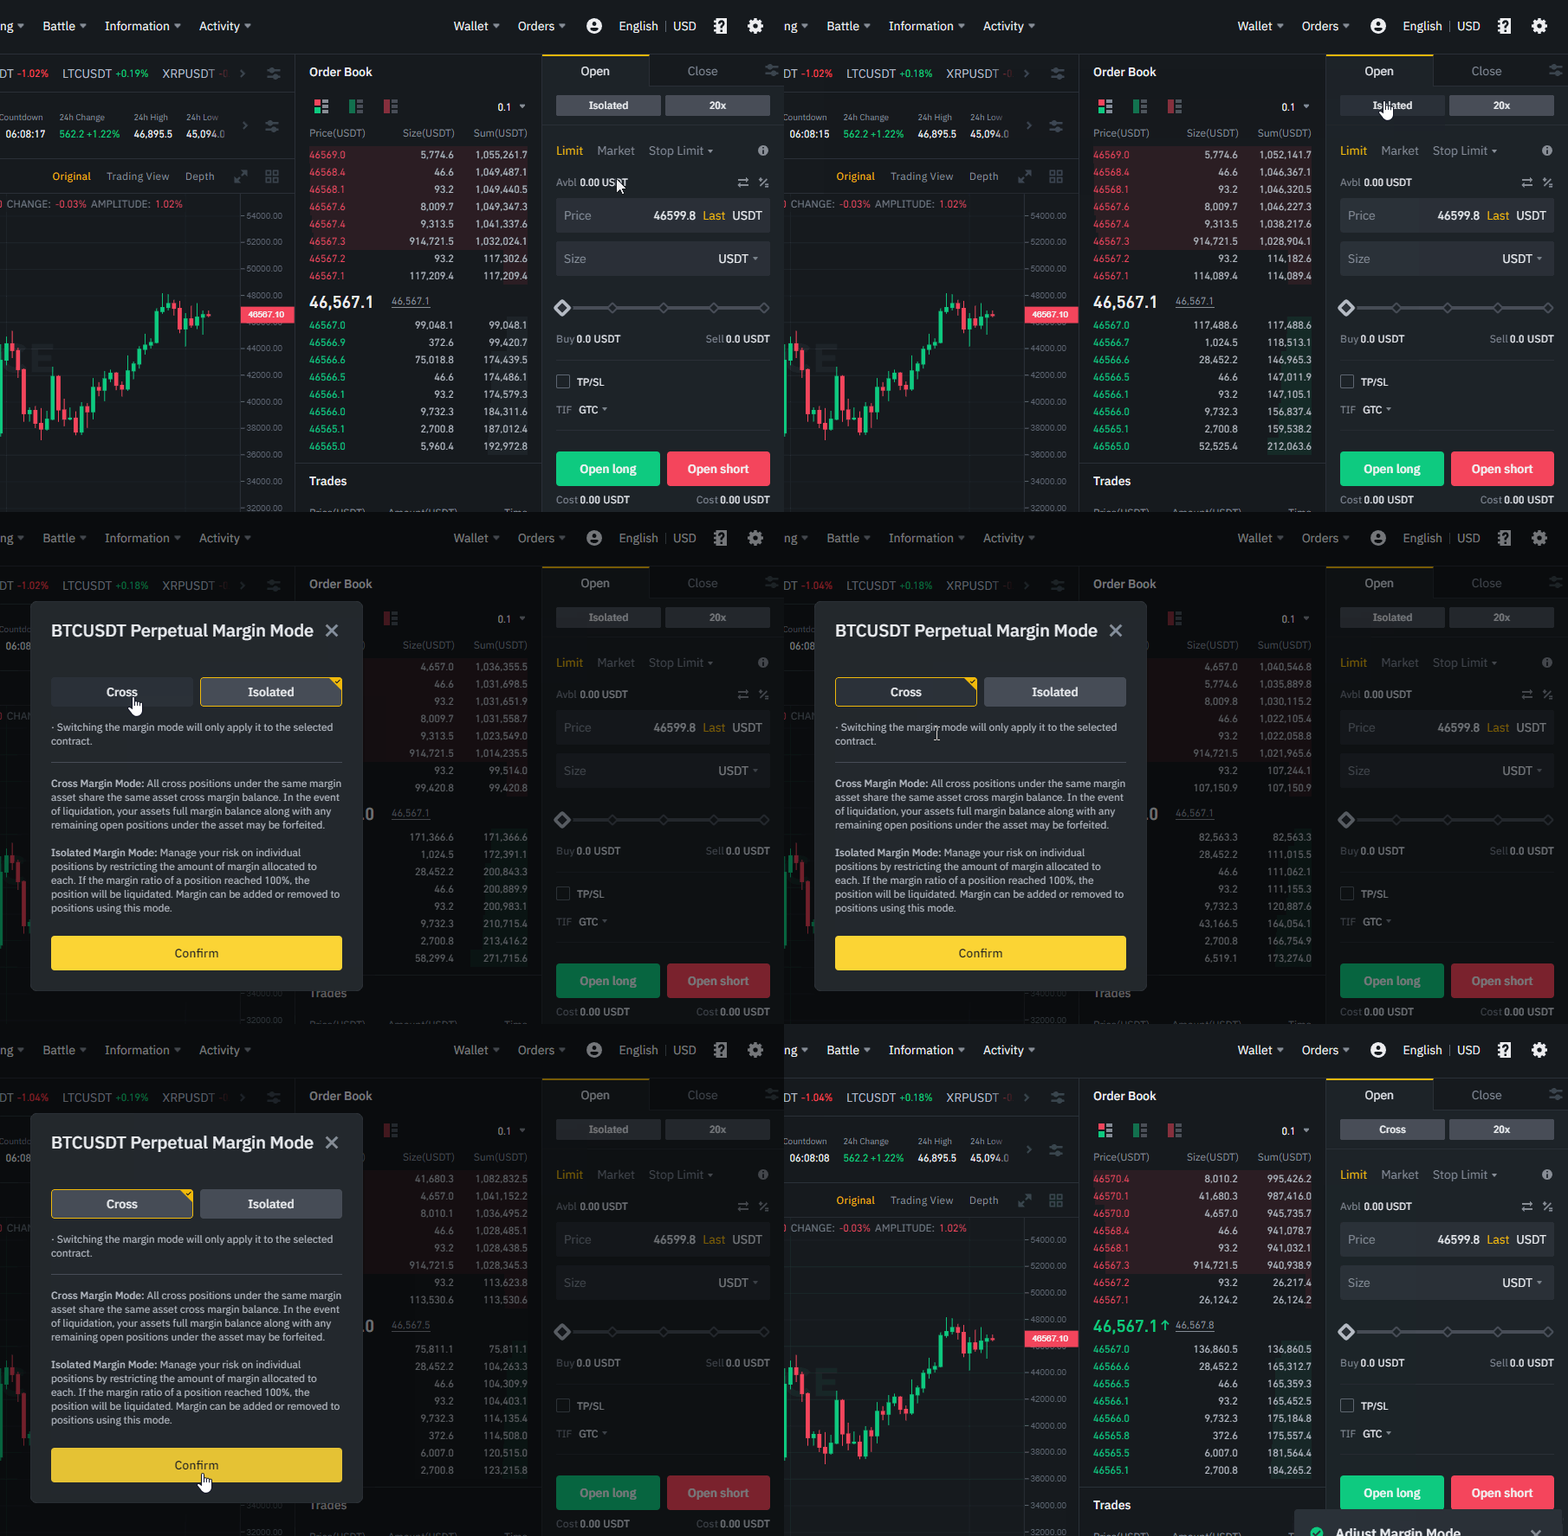
1. Log in to your Binance Account and click USDS-M futures.
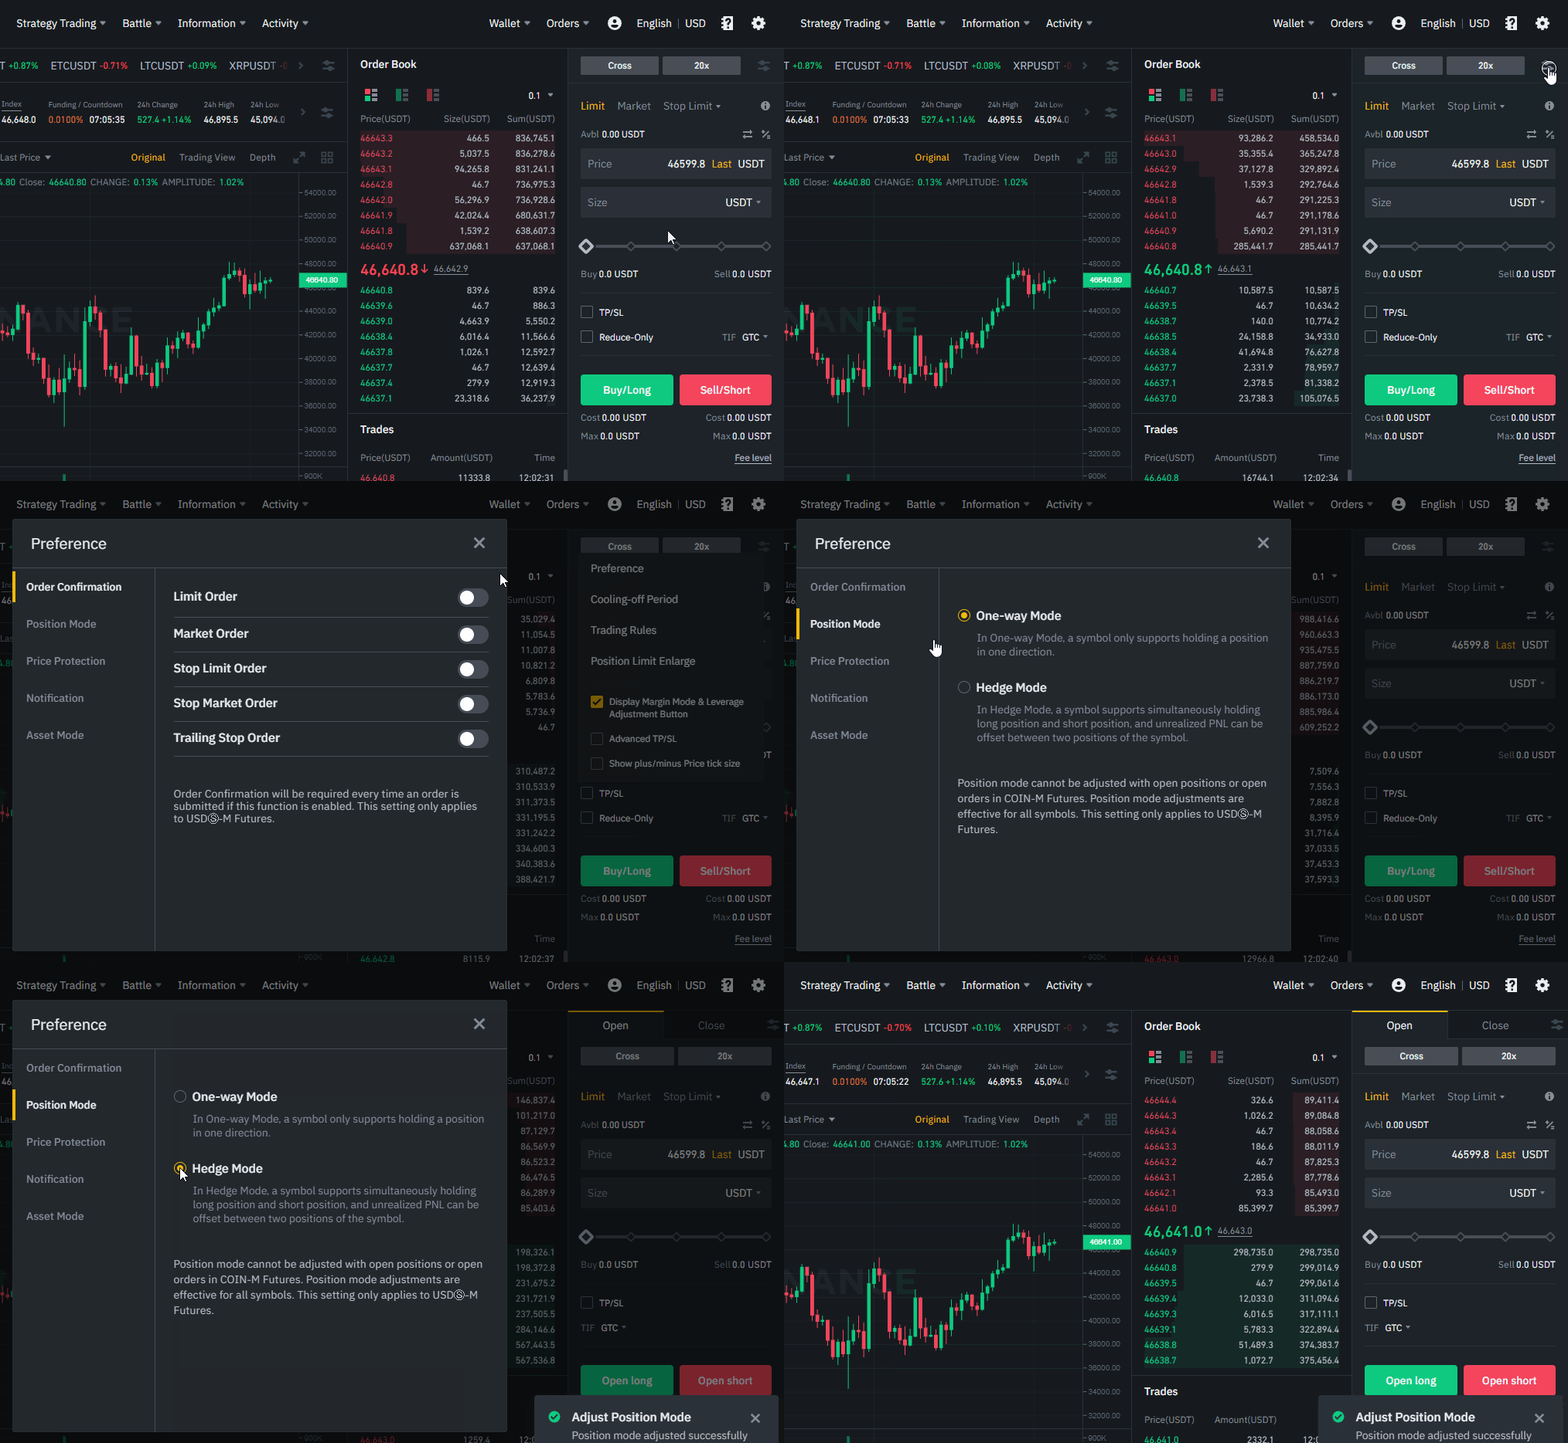
2. Click the icon on the right and then click “Preference”. You will see a small window, click position mode and select hedge mode and close the window. All done, now you have enabled the hedging mode.
I am text block. Click edit button to change this text. Lorem ipsum dolor sit amet, consectetur adipiscing elit. Ut elit tellus, luctus nec ullamcorper mattis, pulvinar dapibus leo.
How to create API keys
For connecting the Cleo Trading Platform account to your Binance account, you will need to create an API key. It is pretty simple and takes just a couple of minutes.
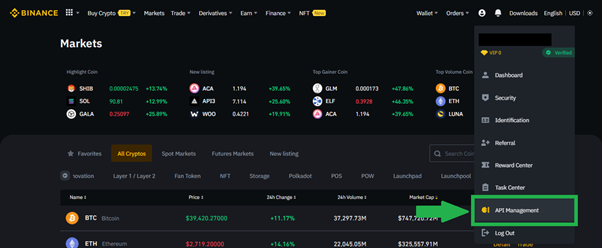
1. Log into your Binance account. Hover over your account details in the upper right corner and select “API Management”
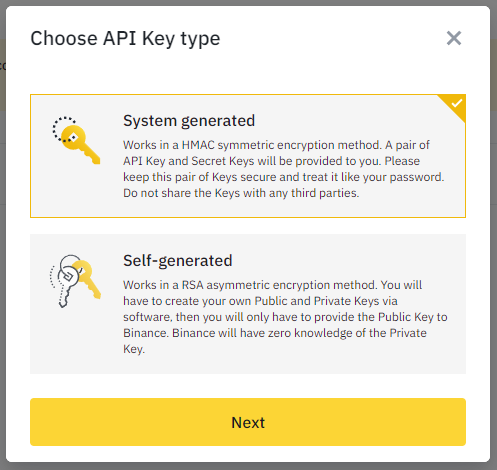
2. On the next screen click “Create API” and select “System generated API Key” then click on the “Next” button.
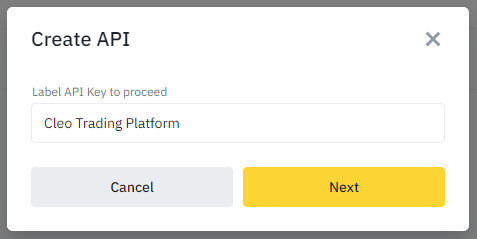
3. Name the keys you are about to generate. It should be something you can easily identify, such as “Cleo Trading Platform”. Click on Next.
On the security verification screen, you will see the “Authenticator App” and “Email”. You need to input codes for both of these.
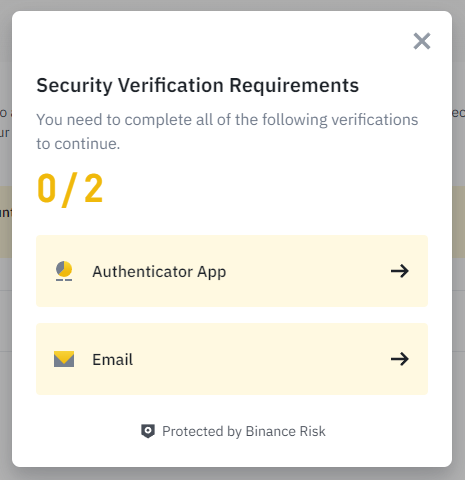
Click on the “Authenticator App” and input your 2FA code. And then click on “Email” and enter your verification code.
4. You will be redirected to the API settings. In the right upper corner, you can edit the restrictions.
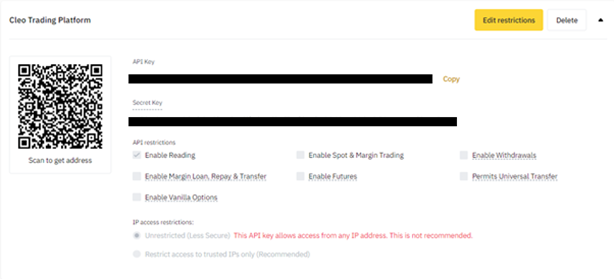
5. Your API Key and secret have been successfully created. However, in order to use them for trading on Binance, you need to whitelist the IP addresses of Cleo.finance in your API Key settings. It is a simple step to do that.
Go to Cleo.finance App and navigate to the Binance connect account page. And copy the displayed IP addresses.
Next go back to your API key settings and click “Edit Restrictions”. Paste the IP addresses into the “Restrict access to trusted Ips Only” field, as shown in the GIF. Click “Confirm” and then make sure the “Enable Futures” box is ticked and click “Save”.
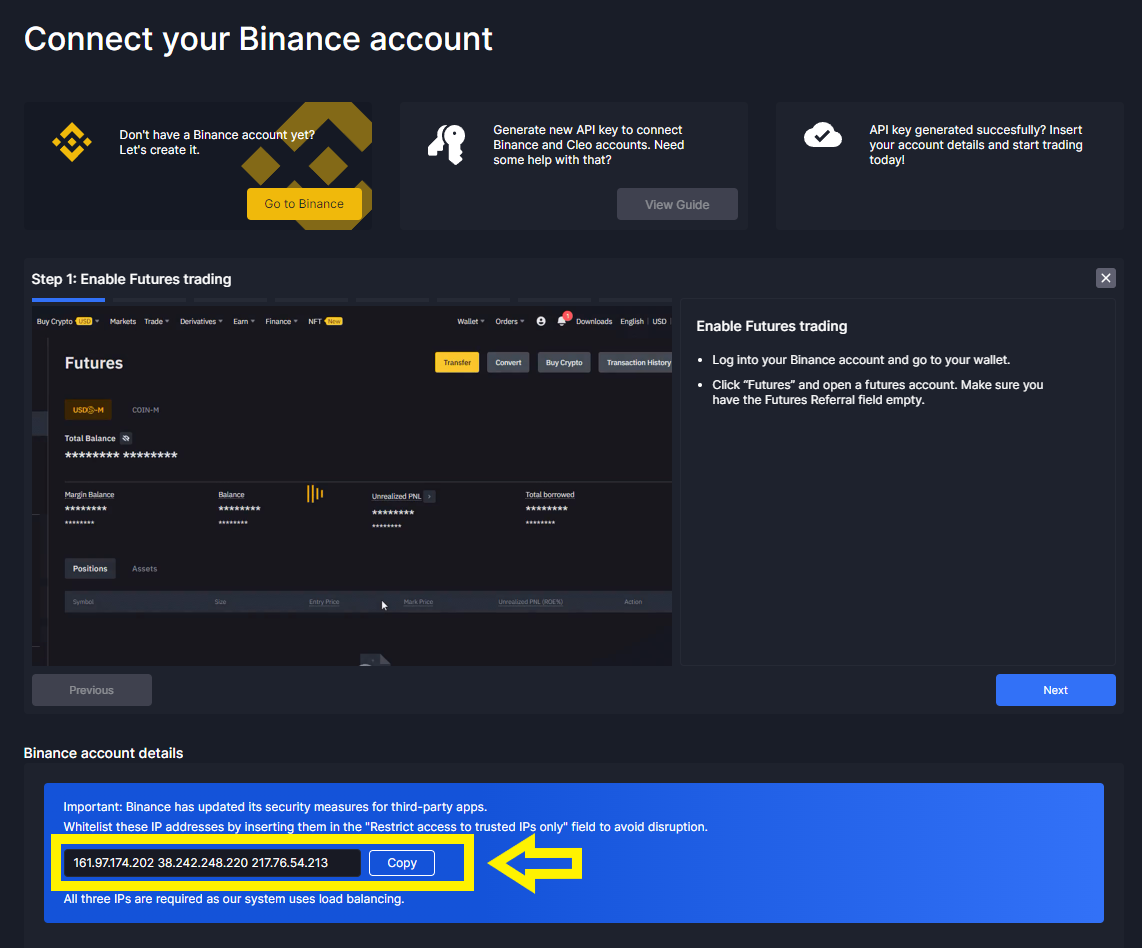

After clicking “Save”, you will need to enter your 2FA code and the changes will be saved.
You will need API key and Secret, so make sure you copy both of the values!
How to connect your Binance account
Connecting your Binance account to Cleo Trading Platform via API keys takes minutes. If you don’t know how to create API keys, please check out here.
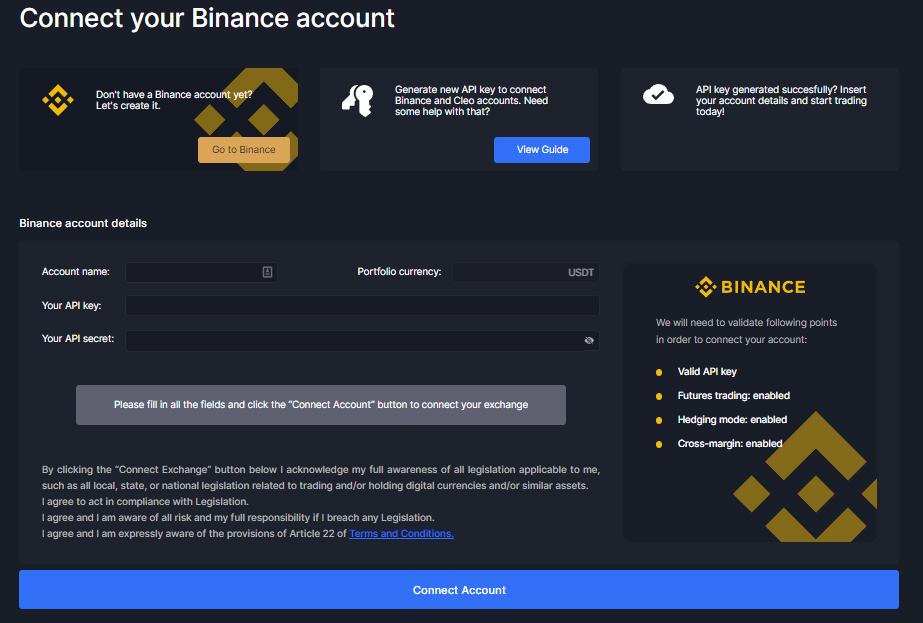
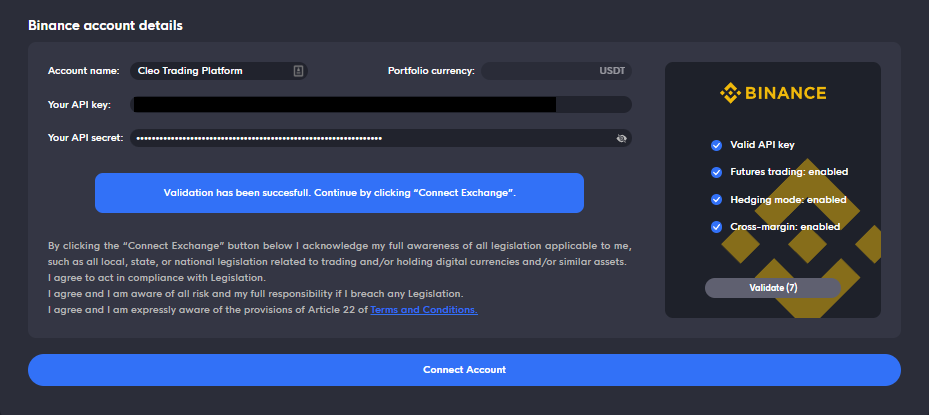
- Type your preferred account name. Then put your API key and API secret.
- Click the “Validate” button on the right.
- Once you met the validation points, click the “Connect Account”
